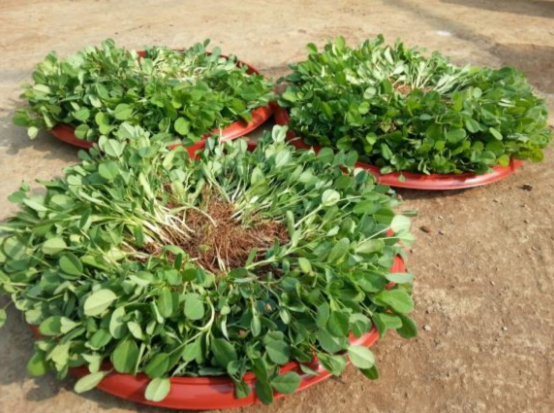
Microgreens
Microgreens are tiny plants of almost any vegetable variety you like. They are not sprouts, but are tiny seedlings between 10-14 days old.
Microgreens are loaded with nutrients like vitamins C, E, K and Beta Carotene. Compared to mature greens, they have a wide flavor profile from fruity and sweet to earthy and spicy.
Fresh Microgreens are ready in no time; from your window to your plate, they may be mixed directly in your salads or sandwiches. They are best when eaten raw and fresh.
Microgreens need the least amount of care and time to grow. They can be grown year-round. All you need is a container, some soil, seeds, water and lots of love.

Questions & Answers
Can I get continuous supply of microgreens from my window for all my meals?
Microgreens take up very little space and germinate fast. Therefore, it is absolutely possible to get a daily supply of your favorite microgreens. To maximize the space, you can grow them vertically in utility racks or on suspended PET bottles by the window. Just try different varieties of veggies and choose which flavor appeals to you and your family members. Sowing every other day can generate a regular supply of fresh greens.
Which are the best microgreens to start with?
You can start with mustard, broccoli, red cabbage, cilantro, radish or fennel. These have the highest amount of nutrients and are very tasteful. Red cabbage microgreens have forty times the Vitamin E and six times the Vitamin C than a mature red cabbage. Cilantro microgreens can have four times the Beta Carotene than the mature Cilantro.
Which is the best way to consume the microgreens?
Microgreens have a short shelf life and therefore have to be consumed upon harvesting. Also, they cannot be refrigerated or frozen as they loose their freshness and crispness. Therefore, the best way to consume them is raw and in the form of salads, sandwiches or soups.
Can I reuse the same soil to grow my new batch of greens?
Yes, certainly you can use the same soil; it does not need to be discarded. However, the microgreens use up the nutrients present in the soil and therefore, each time you sow again you need to replenish the soil with a handful of manure, such as home compost or vermicompost, for best results.
Why didn’t my seeds germinate?
A few facts are important to ensure good germination results each time.
The ideal conditions for seeds to germinate are correct sowing depth, darkness, moisture and warmth (temperature).
There is a thumb rule for the depth for sowing the seed in the soil. Thesowing depth must always be the size of the seed. If the seedsare sown too deep, they might not be able to push themselvesthrough the layers of the soil to reach the sunlight, as there is no energy left in the seeds after germination.
Watering: If you have over-watered, then the seed may encounterfungus or mold and may not germinate. Similarly, if you haveunder-watered the seed, it may remain hard and not soften enough tobreak open the seed coat.
Seed Germination Rate: The seed germination rate is always printed onthe back of your seed packet. It is usually between 80 - 90% but may vary based on different seed manufacturers or brands. This simply means that 8 outof 10 seeds will germinate and 2 out of 10 may or may not germinate. Therefore, if no seeds germinate, the reason could be the quality of the seeds. So don't give up and try again with a new packet of seeds.
This is an article provided by our friendly partners from Earthoholics:
Text: Smita Shirodkar
Photos: Earthoholics